Corrugated Metal Fence Installation in Anchorage: Frost-Line Depth and Ground Prep Steps
Corrugated metal frost line fence installation in Anchorage lives or dies below the ground, not above it. The panels are the easy part. What decides whether your fence stands straight in five years is how deep the posts go, what the footings sit in, and how the ground was prepped before anyone mixed concrete. This guide walks through the full process step by step, with the Alaska-specific ground work built in, so you know what a proper job looks like before you budget for one or walk a quote with a fence company.
Most national guides skip frost heave entirely. Here, freeze-thaw cycles move posts and footings every winter, and a post set the way it would be in Texas will lean, lift, or snap panel fasteners within a few seasons. For context, Anchorage's building code amendment sets the minimum exterior footing depth at 42 inches below finished grade, according to PermitsGuide.com. Fence posts are not foundations and are not always held to that figure, but it tells you how seriously this ground treats shallow concrete. Planning the dig around deep frost, not around what a lower-48 video shows, is central to frost line fence installation in this climate.
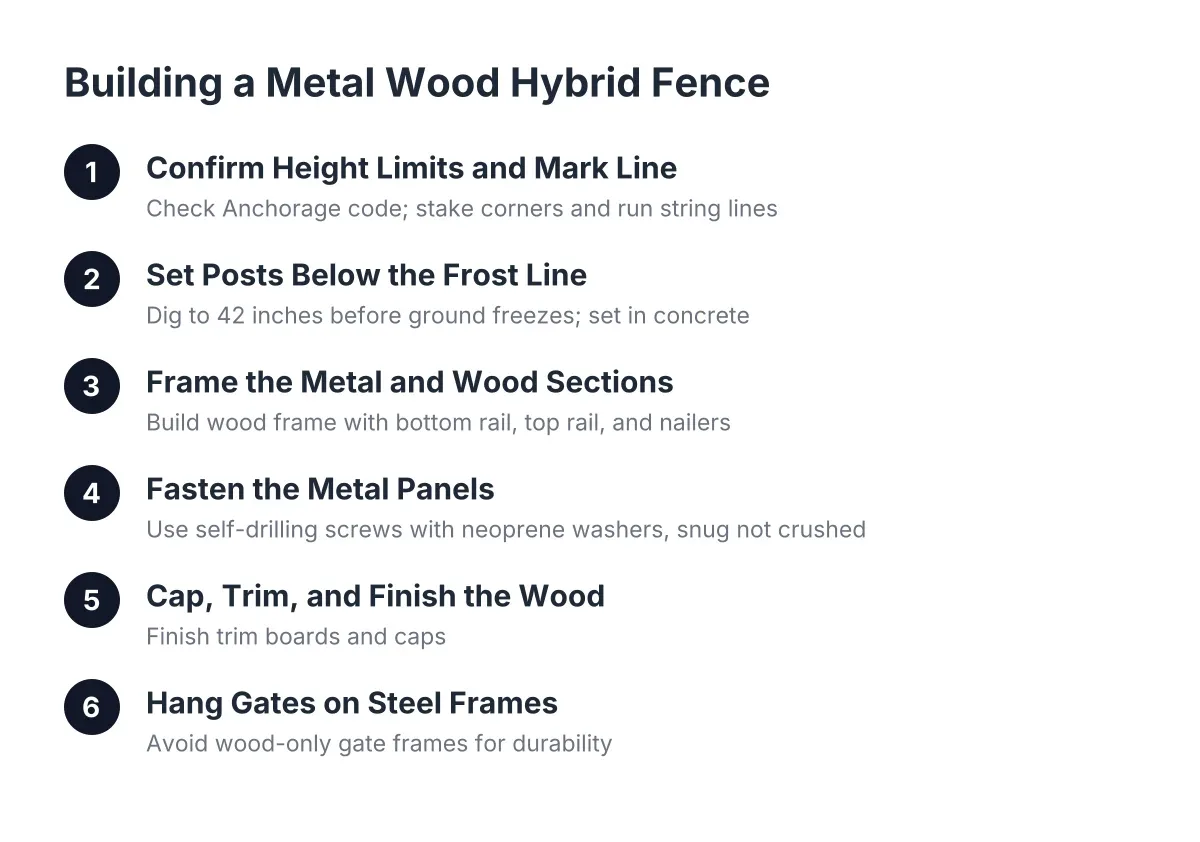
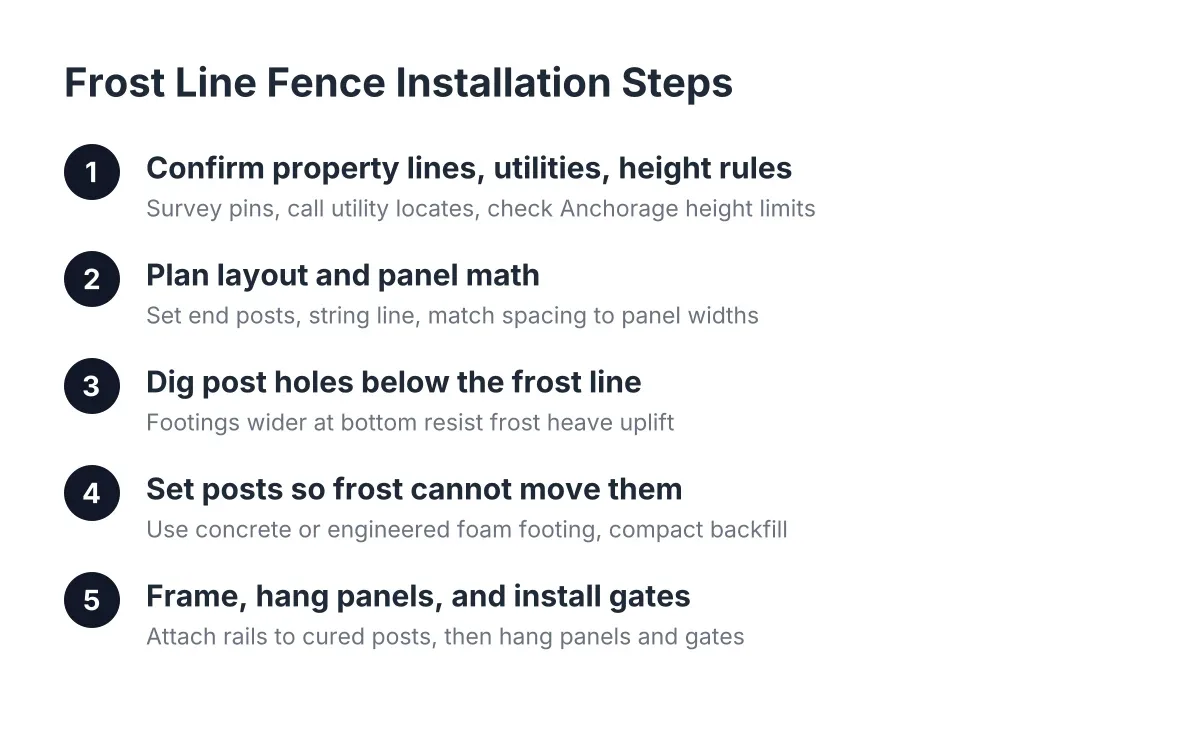
Step 1: Confirm Property Lines, Utilities, and Height Rules
First, know exactly where the fence can go and how tall it can be. On large parcels in Knik-Fairview, Wasilla, or Meadow Lakes, property pins may be buried or missing; find them or have the lot surveyed before you set a single post. Moving a fence line after the fact is the most expensive mistake on a long run.
Next, call for utility locates before any digging. Deep post holes make this non-negotiable.
In addition, check local rules on height. Inside the municipality, Anchorage Municipal Code limits front-yard residential fences to 4 feet in most zones, with 6 feet allowed in some districts, according to the Municipality of Anchorage. Solid corrugated panels count as sight-obscuring, so they face the stricter limits where those apply. Rural parcels outside the municipality have more flexibility, but verify before you order material.
Step 2: Plan the Layout and Panel Math
Lay out the full run on paper before buying anything. Corrugated metal fence panels come in fixed widths, and your post spacing has to match the framing plan, usually with posts set so panel edges land on rails cleanly.
A few layout rules save headaches later:
- Set a post at each end of a run first, then stretch a string line between them. Every hole gets dug to that line, which is the only way a long rural run stays straight.
- Put full panels in the most visible stretches, along the driveway or facing the road. Push any cut or shortened sections into corners and low-visibility areas, and plan trim to hide cut edges.
- Shorten post spacing on sloped sections. On steep grade, full-length rails will not seat properly between posts, so tighter spacing keeps the frame tied together.
- Use an existing straight feature, like a gravel drive edge or old fence line, as a reference where it helps.
For a corrugated metal and wood fence, this is also where you decide the frame style. Treated wood posts and rails with metal infill is the common build; steel posts with wood rails is another. The hybrid look is popular on new builds, and the framing material changes both cost and how the posts get set in Step 4.
Step 3: Dig Post Holes Below the Frost Line
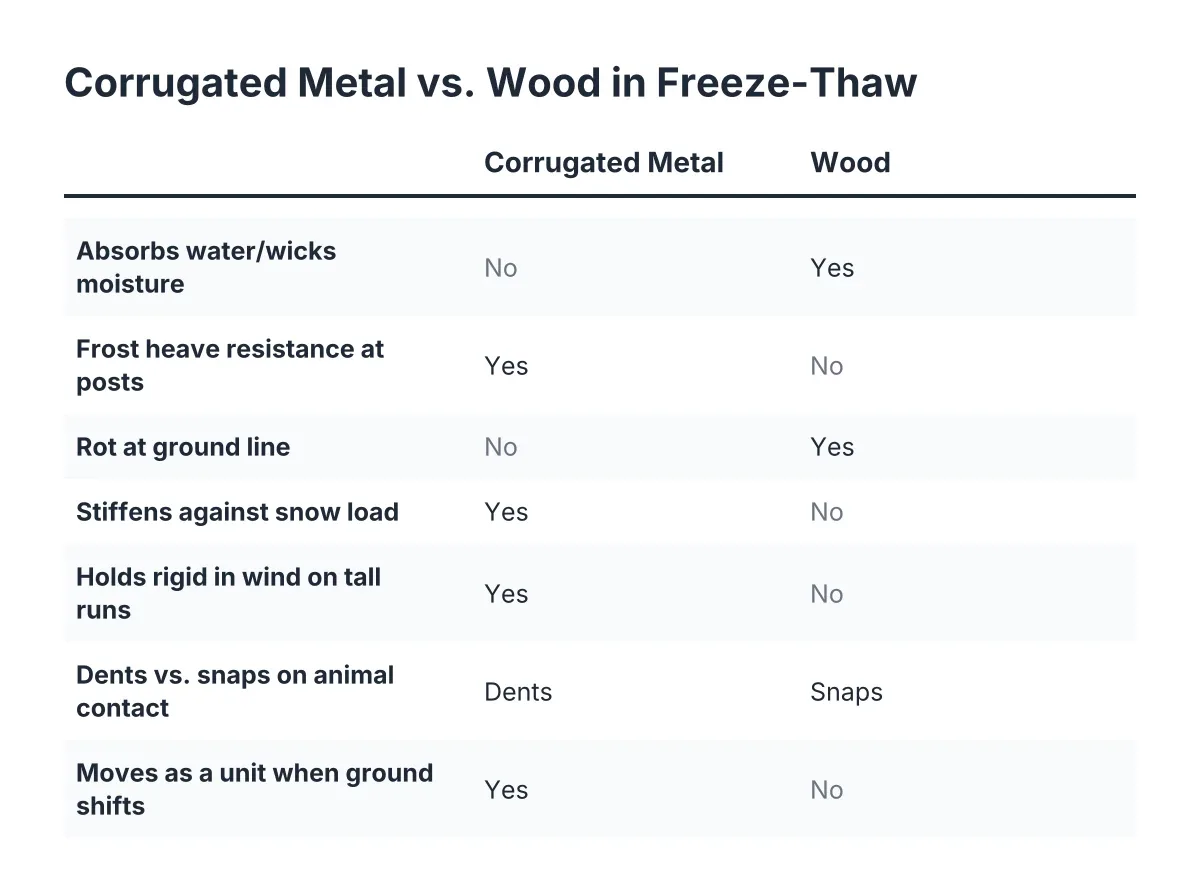
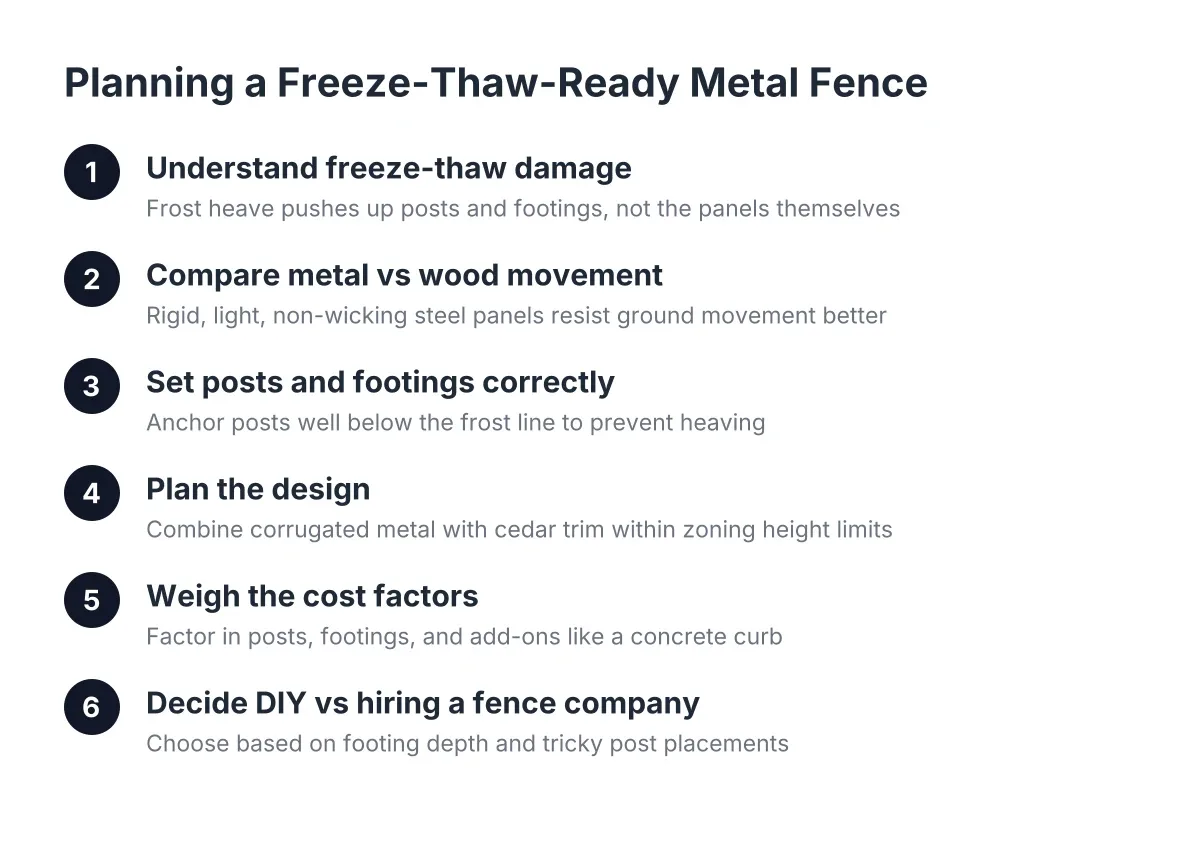
This is the step that separates an Alaska fence from a lower-48 fence. Frost heave works by freezing soil gripping the post or footing and jacking it upward a little each winter. A shallow footing rides up and never fully settles back. Over a few seasons the fence line waves, gates bind, and panel screws shear.
Therefore, holes need to reach below the depth where seasonal frost gets its grip, and the footing shape matters as much as depth. A footing that is wider at the bottom than the top resists uplift. Exact depth is a site call; soils on a wooded Meadow Lakes parcel behave differently than fill on a newer Anchorage subdivision lot, so treat depth as something to confirm on the ground, not a number copied from a video.
On rocky or root-heavy ground, expect an auger to stall and hand work to take over. Budget time for it. If you hit standing water or soft organic soil at depth, stop and get a professional opinion; a fence set in muck will move no matter how deep the hole is.
Step 4: Set Posts So Frost Cannot Move Them
Set the two end posts of each run first, plumb them, and let them hold the string line. Then set line posts to the string.
Backfilling with tamped dirt alone is not an acceptable practice for a fence carrying solid panels. Corrugated metal acts like a sail; wind load that passes through chain link hits these panels full force. Posts need concrete or an engineered foam footing, and the backfill around it needs thorough compaction. Loose compaction is the main reason posts work loose under wind and water load over time.
Two details improve how the footing behaves through winter:
- Keep the concrete collar below grade and cap it with a layer of soil rather than leaving concrete exposed at the surface. It looks cleaner and helps lock the post in place through freeze-thaw.
- Slope the top of the footing so water sheds away from the post instead of pooling against it and freezing.
For tight spots, such as butting into an existing fence or working around a tree, a reinforced post using a steel pipe core with a sleeve over it adds strength where a standard post will not fit or hold. Let posts cure fully before loading them with rails and panels.
Step 5: Frame, Hang Panels, and Install Gates
With posts cured, run the horizontal rails. Rails must seat fully into or against the posts; on wood frames that means solid fastening at every post, and on steep slopes it confirms why you tightened spacing in Step 2.
Hang the sheet metal with the ribs vertical so snow and rain shed down the panel. Use screws with sealing washers, drive them snug but not crushed, and overlap sheets by one full rib so the seam locks. Leave a gap at the bottom of the panels above grade. Metal sitting in snowpack and wet soil all winter corrodes at the cut edge, and a gap also gives plowed or drifted snow load somewhere to go besides the panel face.
Gates deserve their own attention. A gate post on a corrugated fence carries constant leverage plus snow against the gate leaf, so it should be the heaviest, deepest-set post on the job. If the budget allows one upgrade, put it here.
What Frost Line Fence Installation Costs in Anchorage
Frost line fence installation in Anchorage is priced by linear footage, post depth and footing method, frame material, terrain, and access. There is no honest flat number; a 60-foot backyard section in town and an 800-foot perimeter run on acreage are different jobs even with identical panels, so treat all figures as factors to discuss on a fence estimate.
For calibration, chain link runs about $10 to $40 per linear foot installed, according to HomeGuide, and a wood fence typically costs 20 to 30 percent more than comparable chain link, according to Angi. A framed corrugated metal fence usually lands in wood-fence territory or above it, because it carries the same frame plus metal infill and the same deep post work.
Suppose a hypothetical owner of a five-acre parcel near Wasilla wants 300 feet of corrugated privacy screening along the road side and plans the rest in field-grade chain link. In that scenario the corrugated section drives most of the budget: more posts per foot, concrete at every post, and panel material. Splitting materials this way, metal fence where it shows, chain link fence where it works, is a common move for keeping a large-acreage project inside a realistic range.
The main cost levers to walk through on any quote:
- Linear footage and fence height
- Post hole depth and footing method for frost heave
- Frame material: treated wood versus steel posts
- Panel gauge and finish
- Gate installation count and gate hardware
- Terrain, slope, rock, and equipment access
- Season; digging must finish before the ground freezes
When to Bring in a Frost Line Fence Installation Professional
A capable owner with a tractor and an auger can build a corrugated fence on flat, clean ground. The honest trade-off is below grade: footing depth, footing shape, and compaction are judgment calls that depend on your soil, and they are where DIY corrugated metal fence installation most often goes wrong. If your ground is wet, rocky, sloped, or you hit questionable soil at depth, that is the point to get a professional read rather than pour and hope.
As of 2026, install season is still the hard constraint here. Long dark winters compress the calendar, and post holes have to be dug and poured before freeze-up. If you want panels standing before snow flies, lock in the plan, the layout, and the estimate conversation by mid-summer. The fence you see is metal and screws; the fence that lasts in Anchorage is 42 inches of thinking you never see.
If you need fence installation in Anchorage, AK, Anchorage Fence Co can help.
Prefer to talk it through? Call (907) 312-2862 — a quick call is usually the fastest way to get a straight answer for your situation.