Why a Chain Link Fence Doesn’t Heave in Alaska Winter: The Footing Advantage
If your wood fence just leaned over after a hard freeze, you have probably noticed the neighbor's chain link looks fine. There is a reason for that. A properly set chain link fence doesn't heave the way a wood fence does, and it comes down to how the posts and footings handle frozen ground. Fence frost heave is the problem you face when ground freezes, expands, and lifts posts out of alignment. This guide walks you through why that is and how to make sure your own chain link fence gets installed, or repaired, so frost heave never becomes your spring problem.
This matters most if you own acreage out toward Knik-Fairview, Wasilla, or Meadow Lakes, where long fence runs mean dozens or hundreds of posts, and every heaved post is a repair bill. It also matters if a storm just flattened a section and you are deciding what to rebuild with. Follow these steps in order.
Step 1: Understand Why Frost Heave Moves Fence Posts
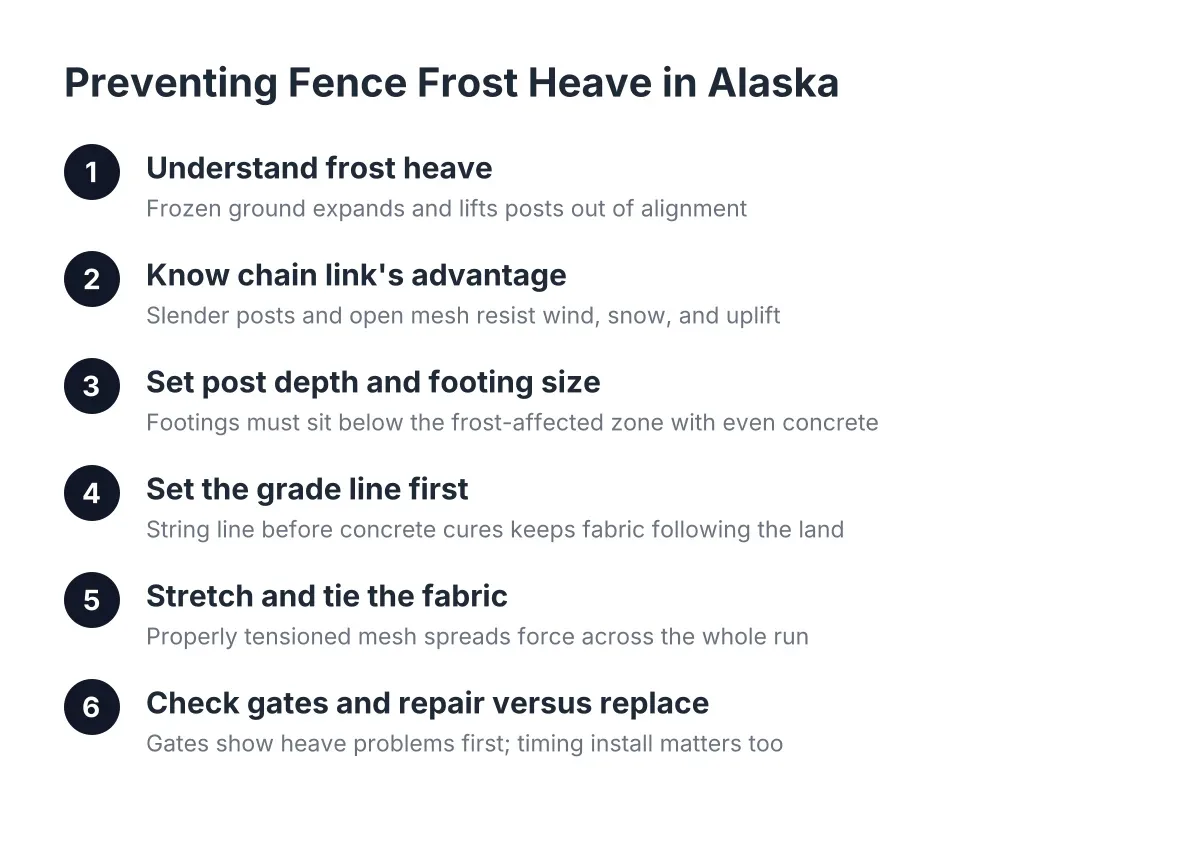
Frost heave is simple in concept. Water in the soil freezes, expands, and pushes upward on anything buried in it. As the frozen layer grips a post or footing, it can lift the whole assembly. When the ground thaws, the post settles back down, but rarely to the same spot. Repeat that cycle every winter and posts walk out of the ground, lean, or crack their concrete.
Two things decide whether a post heaves:
- How deep the footing sits. A footing that bottoms out below the frost line has stable, unfrozen soil pushing back from underneath. A shallow footing rides the frozen layer up and down like a boat on a tide.
- How much surface the frozen soil can grab. Wide, rough, or irregular footings give frost more to grip. Smooth, slender posts give it less.
Anchorage's building code amendment sets the minimum exterior footing depth at 42 inches below finished grade for frost protection, according to PermitsGuide.com. That figure applies to building foundations, not every fence post, but it tells you how seriously this region treats frozen ground. Plan your fence posts around the same reality.
Step 2: See What a Chain Link Fence Doesn't Have to Fight
A chain link fence skips most of the physical burdens that make other fences heave and fail. The design works in its favor three ways.
First, the posts are slender round steel pipe. Compared with a 4×6 wood post or a wide masonry pier, there is far less surface area for freezing soil to grab and lift. Less grip means less uplift force on the footing.
Second, the fabric is open mesh. Wind blows through it instead of pushing on it like a sail. Snow load, the force that flattens so many solid privacy fences in Anchorage, mostly passes through chain link mesh too. A fence that doesn't catch wind and snow puts far less lateral strain on its posts, so the footings are not getting rocked loose all winter.
Third, chain link fabric flexes. If one post does shift slightly, the mesh absorbs the movement instead of cracking a rail or popping a picket. A wood fence telegraphs every bit of post movement into visible damage. Chain link doesn't, which is why a chain link fence doesn't show its age the way a cedar fence on the same soil does.
None of this means chain link is immune. A post set shallow, in a skimpy footing, will heave no matter what material it is. The design advantage only pays off when the installation respects the ground.
Step 3: Get the Post Depth and Footing Size Right
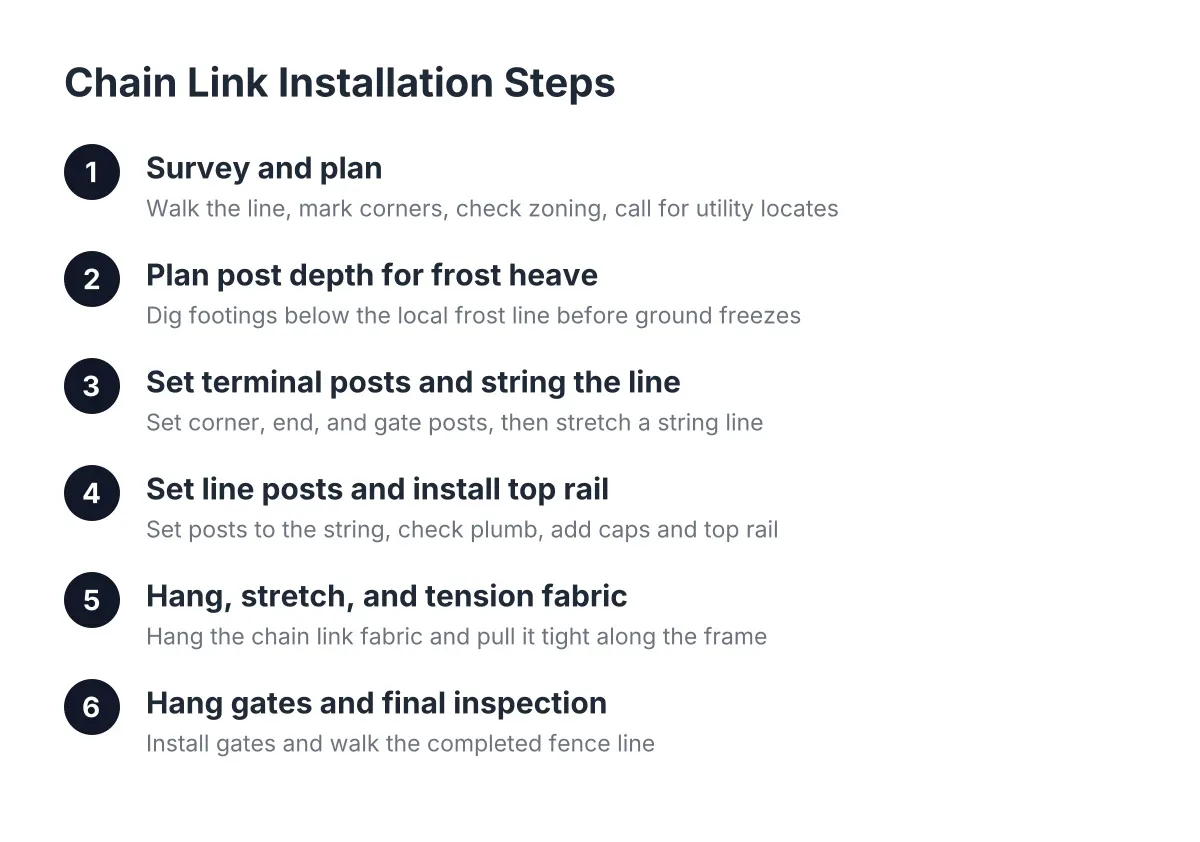
This is the step that decides whether your fence stands straight in ten years. Depth comes first. Each post footing needs to extend below the local frost-affected zone, and in Southcentral Alaska that means deep holes dug before the ground freezes in fall. Dig in September and you are drilling soil. Wait until November and you are fighting concrete-hard ground.
Footing size matters as much as depth. A common mistake is thinking any amount of concrete is enough, or that dumping extra bags into a sloppy hole fixes a bad dig. It doesn't work that way. What a post needs is a generous, even collar of concrete on all sides. A post set in a narrow footing with thin concrete on one side is prone to the concrete cracking under lateral force, and a cracked footing becomes a permanent wobble point.
For example, say a homeowner on five acres near Meadow Lakes sets 40 line posts for a pasture perimeter. If ten of those holes were augered off-center and the posts sit against one wall of the hole, those ten footings carry thin concrete on one side. In that scenario, the first winter of freeze-thaw finds every one of them, and the owner spends the spring resetting posts that should have lasted decades.
One more point for anyone replacing a failed fence: if sound old concrete footings sit along the line, leaving them in place can help stabilize the surrounding soil. Ripping every old footing out disturbs ground that had already settled.
Step 4: Set the Grade Line Before Any Concrete Cures
Alaska lots are rarely flat. Driveways pitch, pads slope, and acreage rolls. Before the first footing cures, run a string line across the post tops so every post holds a consistent height above grade. The fence should follow the surface of the land uniformly, not jump in steps where the installer eyeballed it.
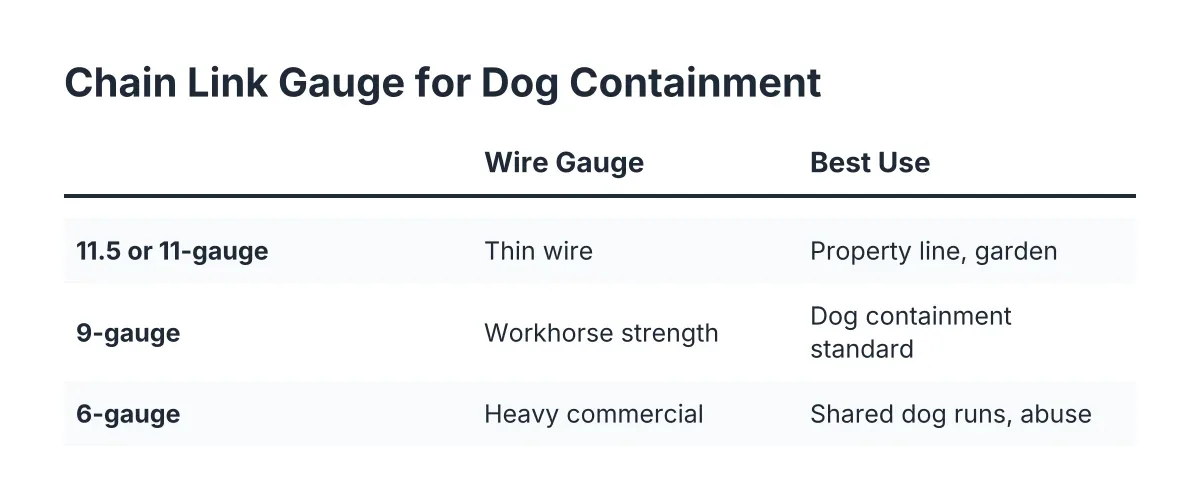
This also addresses the classic complaint that a chain link fence does not reach the ground in spots. Gaps at the bottom usually trace back to posts set without a grade line, so the fabric bridges dips instead of following them. On acreage where you are containing dogs or livestock, plan for bottom tension wire and, in low spots, grading or fill so the mesh follows the ground. Fix this at layout, not after the fabric is stretched.
Step 5: Stretch and Tie the Fabric So It Shares the Load
Fabric work seems cosmetic, but it affects how the fence handles winter. Properly tensioned mesh distributes force across the whole run instead of loading one post. Tie the fabric to posts and top rail with fence ties sized for the pipe diameter; ties come in different lengths for a reason, and a tie that barely wraps the pipe will loosen.
In addition, small installation habits add up over a long run. Standing on the side of the post opposite the mesh while tying, where access allows, makes clean, tight ties easier. On a 600-foot pasture run, sloppy ties mean rattling fabric and uneven tension by the second winter.
Step 6: Check Gates, Because That Is Where Problems Show First
Gates concentrate stress. A gate post carries the full swinging weight plus every slam, so its footing takes more abuse than any line post. If anything on your fence is going to reveal a marginal footing, it is the gate sagging out of alignment by March.
Run through this list each fall and spring:
- Gate swings freely and latches without lifting or forcing
- Gate posts stand plumb, with no cracked concrete at grade
- Hinges are tight and the gate frame is square
- The gap between gate and post has not widened since last season
A sagging gate on solid posts is usually a hinge adjustment. A sagging gate on a leaning post means the footing moved, and that calls for a reset, not a shim. If you are wondering how to replace a chain link fence gate entirely, the honest answer is that the gate is the easy part; confirm the posts first.
Step 7: Repair Versus Replacement When Frost Heave Damage Appears
If you are reading this because snow load or a falling branch just took out a section, here is the straight framing. Chain link damage is usually localized. A bent top rail, torn fabric panel, or one leaned post can be repaired without touching the rest of the run, which is one more cost advantage of the material.
Replacement enters the conversation when footings have failed along most of the line, when the fabric is rusted through across long stretches, or when the original posts were set shallow everywhere. At that point you are repairing symptoms every spring instead of fixing the cause once. A fence company that works in Anchorage ground conditions can tell you which situation you have from a walk of the line; this is one place where a professional assessment beats guessing, especially before committing thousands of dollars to a long rural run.
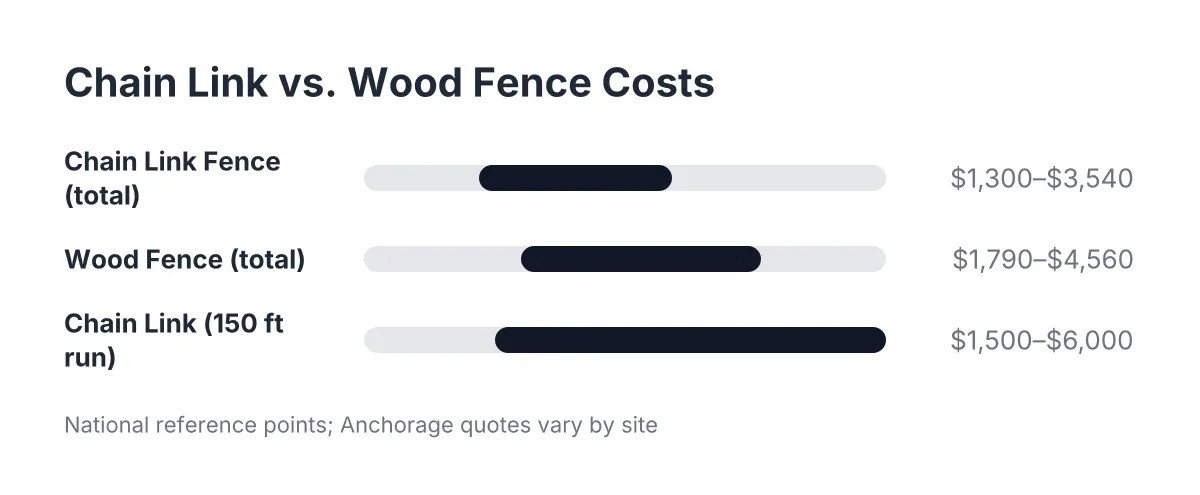
Budget-wise, chain link stays the economical choice either way. HomeGuide puts installed chain link at $10 to $40 per linear foot on average, and Angi reports that a comparable wood fence typically runs 20% to 30% more. On a large acreage perimeter, that gap compounds fast.
Step 8: Time the Work Around the Alaska Install Season
Finally, plan the calendar. Deep footings need diggable ground, so the practical window for new chain link fence installation runs from spring thaw until the ground locks up in fall. As of 2026, that window has not changed, and it fills up. If storm damage hits in late fall, a temporary stabilization that preserves sound footings can hold the line through winter, with the full repair scheduled for thaw. Done right, that interim work is not wasted money; it protects the footings the permanent fix will build on.
One quick aside, since the question comes up: homeowners sometimes ask whether chain link fences need to be grounded electrically. A standard residential or pasture chain link fence doesn't require grounding in normal use; the concern mainly applies to fences near power lines or electrified fencing systems, which is worth raising with an electrician if it applies to your property.
Get the depth right, size the footings generously, set the grade line, and tension the fabric. Do those four things and the frost that flattens other fences will pass under yours every winter without moving it an inch.
If you need chain link fence installation, Anchorage Fence Co can help.
Prefer to talk it through? Call (907) 312-2862 — a quick call is usually the fastest way to get a straight answer for your situation.