Chain Link Fence Installation: From Frost-Line Survey to Final Tensioning
Chain link fence installation looks simple from the street: posts, rails, mesh, done. But in Anchorage, the job is won or lost before the fabric ever comes off the roll. Understanding the chain link installation steps is essential, because frost heave moves shallow posts. Snow load leans on gates all winter. A fence that holds up here follows a specific sequence, from surveying the line and planning for frost depth to the final stretch of the fabric. This guide walks through that process step by step, so you can judge whether a crew knows what they are doing, whether a quote covers the right scope, and what to expect when the work starts.
That matters whether you are a homeowner coordinating a fence with a new build or a property manager who needs a perimeter fence at a rental property to stop generating tenant complaints. The steps below are the same ones a professional crew follows. If you want the fence to still stand straight in five winters, this is the order the work happens in.
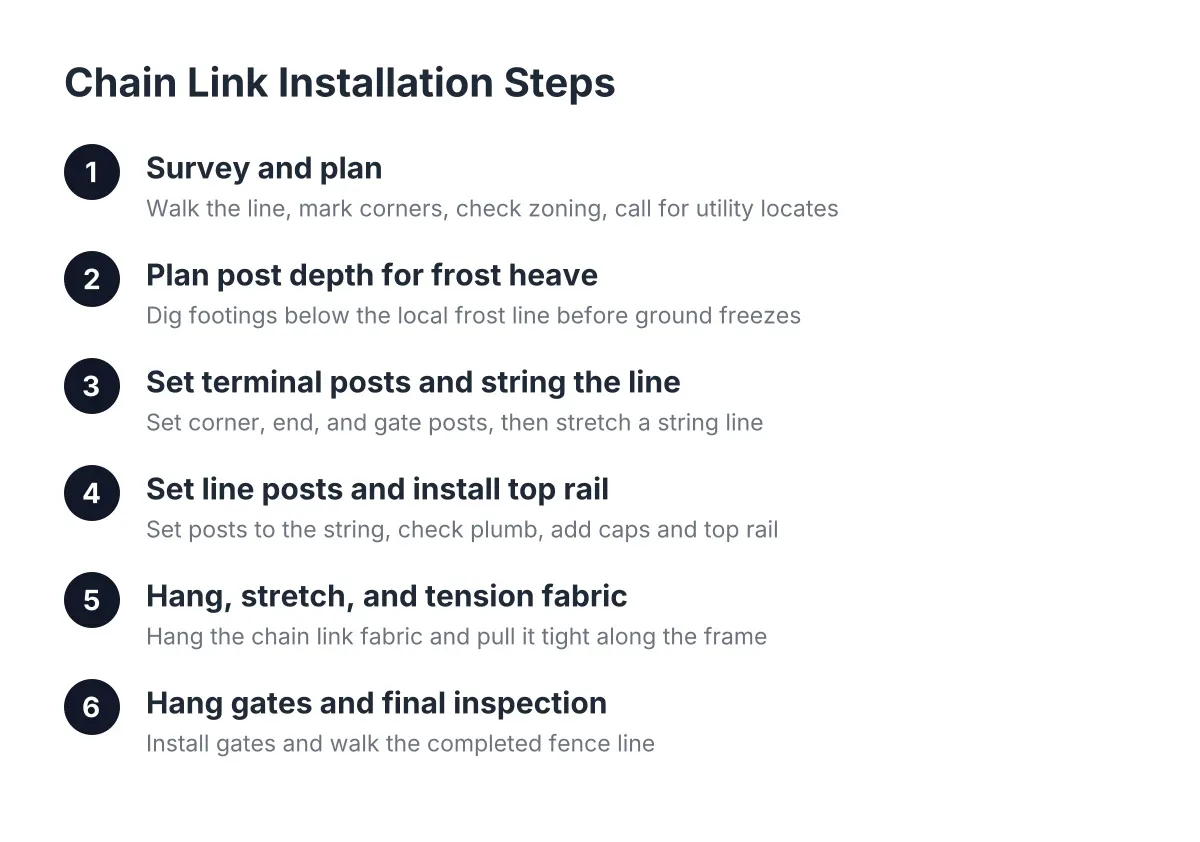
Chain Link Installation: Steps for Surveying and Planning
First, walk the full line before anyone prices or digs anything. Mark the property corners, note slopes and grade changes, and flag anything in the path: tree roots, old concrete footings, buried debris on older in-town lots, or fresh fill on newer subdivision lots that has not settled.
Anchorage has rules worth checking at this stage. Anchorage Municipal Code sets front-yard residential fence height limits at 4 feet in most zones, rising to 6 feet, or 8 feet for non-sight-obscuring fencing like chain link, in R-6, R-8, and R-9 districts, according to the Municipality of Anchorage. Confirm your zone before you order 6-foot fabric for a front yard that only allows 4 feet.
Two more items belong on this step:
- Call for utility locates before any digging. This is not optional, and it takes a few days.
- Confirm the property line. A fence built a foot onto a neighbor's lot is a fence you pay to move. On a new build, your plat or survey pins make this easy. On an older lot, pins may be buried or gone, and a survey may be worth the cost.
For a property manager, this step also means pulling together scope across the site: which runs are failing, where the gates are, and where tenant traffic actually flows. A gate placed where people already cut through lasts longer than one they climb around.
Step 2: Plan Post Depth for Frost Heave
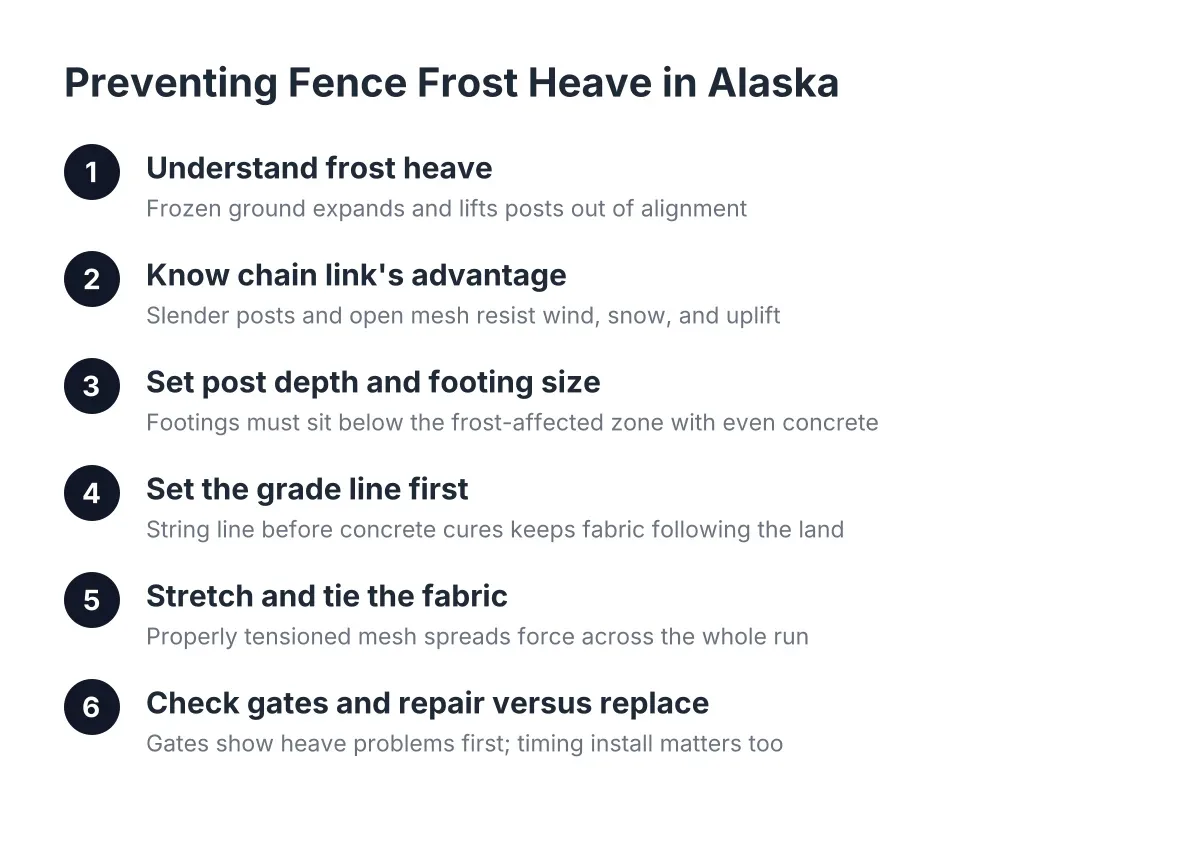
In Anchorage, post depth is the whole game. Freeze-thaw cycles grip shallow footings and push them upward a little each winter. The fix is planning holes that reach below the local frost line, with footings shaped so frost cannot grab them and lift. Treat frost depth as a site condition to plan around with your installer, not a number to guess from a national guide.
This is also where the calendar matters. The digging season in Anchorage is limited; once the ground freezes hard, post setting gets slow and expensive or stops entirely. If your fence is tied to a construction timeline, say a builder hands off the yard in September, get the posts in the ground before freeze-up even if the fabric goes on later. The posts are the part that cannot wait.
Chain link has a real advantage here. The open mesh sheds wind and snow load that would push against a solid privacy fence panel, so the posts carry less lateral force through winter. That is one reason it remains a workhorse choice for rental perimeters and large lots, and demand reflects it: US chain link demand is forecast to grow to 225 million linear feet per year, according to Freedonia Group.
Step 3: Set Terminal Posts and String the Line
Next, set the terminal posts: the corners, ends, and gate posts. These are the anchors that take the tension of the stretched fabric, so they are heavier pipe set in larger footings than the line posts between them.
Once the terminal posts are set and the concrete has cured, stretch a string line between them. Every line post gets located and set to that string. This is how a straight fence happens; eyeballing it does not work over a 150-foot run. On sloped ground, a driveway edge, or a graded pad, the string also runs across the tops of the posts so the fence follows the grade at a consistent height instead of stair-stepping randomly.
Gate posts deserve extra attention in this step. A sagging gate is the most common complaint on rental properties, and it usually traces back to an undersized or under-set gate post, not the gate itself. If tenant vehicles or plows will pass through, say so now, because the post spec changes.
Step 4: Set Line Posts and Install the Top Rail
With the string in place, dig and set the line posts at even spacing along the run. Each post gets checked for plumb and for height against the string before the concrete sets. Rushing this step shows up later as a wavy top line that no amount of tensioning fixes.
After the posts cure, the framework goes on. Post caps, loop caps, and the top rail connect the run into one continuous frame. The top rail is what keeps the fence top straight and gives the fabric something to hang from. On taller commercial runs, a bottom tension wire or bottom rail adds stiffness and stops the mesh from being pushed under, which matters at properties with dogs, kids, or foot traffic testing the fence line.
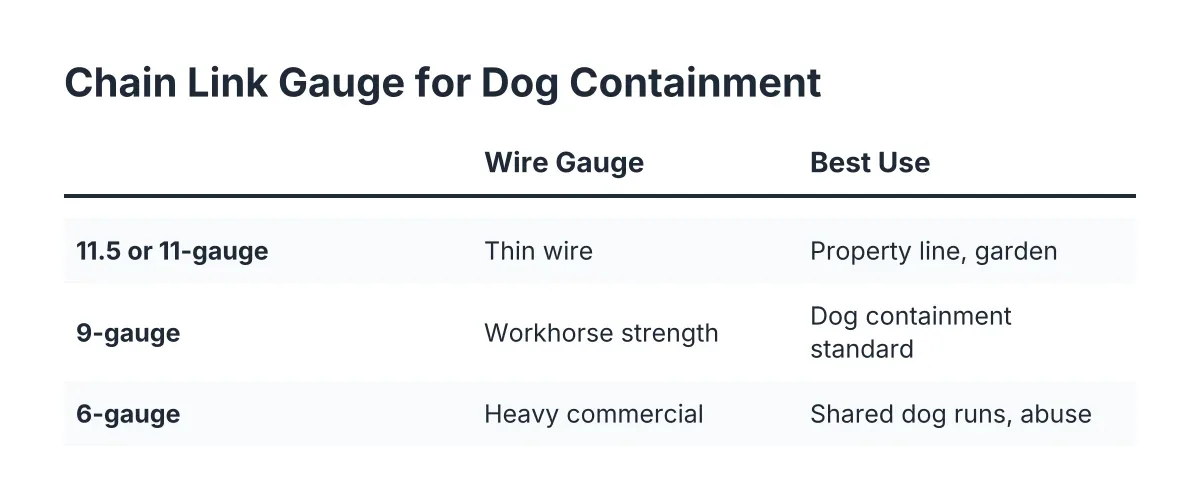
A note on materials while the frame goes up: fabric gauge, pipe diameter, and coating are where quotes quietly differ. A 4-foot residential roll of fabric and a heavier-gauge commercial roll can look identical in a line-item estimate. If you manage multiple properties, ask every bidder to spec gauge, pipe schedule, and coating in writing so you are comparing the same fence.
Step 5: Hang, Stretch, and Tension the Fabric
Now the chain link fabric goes up—the critical steps in chain link installation where the crew stands the roll at a terminal post, threads a tension bar through the end of the mesh, and bolts it to the post with tension bands. Then the fabric unrolls along the outside of the frame to the far terminal post.
Tensioning is the step that separates a tight fence from a saggy one. A fence puller or come-along stretches the fabric until the mesh is snug, with just enough give that the diamonds flex slightly under hand pressure. Overstretch it and the fabric distorts; understretch it and it bellies between posts within a season. Once tension is right, a second tension bar locks the fabric to the far terminal post, and excess mesh gets unwound off the roll.
Tying comes next, and the order matters. The fabric gets tied to the top rail first, which lets the installer lift and align the mesh evenly along the whole run. Tying the bottom first locks the fabric in place before it is aligned and leaves the fence looking uneven. Ties should be bent so the wrap traps the fabric link tight against the pipe. A tie bent the wrong way can work loose in wind, which is why cheap installs start rattling by spring.
Step 6: Hang Gates and Walk the Final Inspection
Finally, the gates go on. Hinges get set so the gate swings clear of snow buildup, latches get checked for one-handed operation, and on commercial jobs, drop rods and locks are fitted. Then walk the full line and check:
- Posts plumb, with a straight top line against the string
- Fabric evenly tensioned with no bellies or ripples
- Ties snug at the top rail and line posts
- Gates swinging freely, latching cleanly, and sized for real traffic
- Concrete crowned at grade so water sheds away from each post
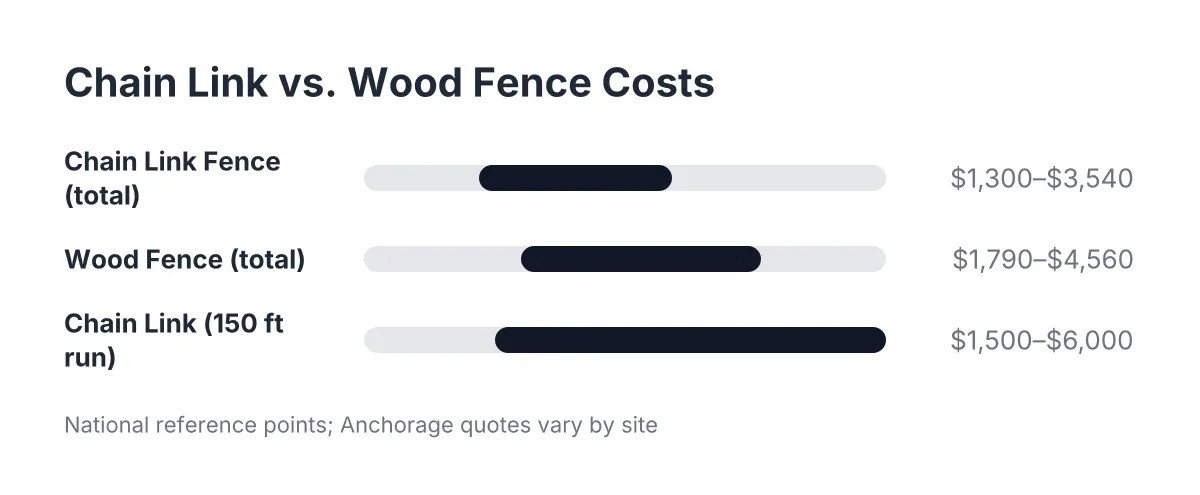
For budgeting, HomeGuide puts installed chain link at $10 to $40 per linear foot, roughly $1,500 to $6,000 for a 150-foot run, and Angi reports a comparable wood fence typically runs 20% to 30% more. Treat those as national reference points; Anchorage ground conditions, access, and gate count move the number, so get a written fence estimate for your actual site.
One honest caveat: a handy homeowner can install a short, flat, 4-foot run with rented tools. However, long runs, slopes, commercial gates, or anything going in close to freeze-up are jobs where frost-depth footings and proper tensioning justify hiring a fence company that builds for this ground. For example, suppose a property manager inherits a fourplex with a leaning perimeter fence and a gate dragging in gravel. In that scenario, the cheap fix is re-tensioning and a new gate post; the right fix depends on whether the original posts were set below frost depth, and that is worth a professional look before any money is spent.
If you need chain link fence installation, Anchorage Fence Co can help.
Related guide: chain link fence — Complete Guide
Prefer to talk it through? Call (907) 312-2862 — a quick call is usually the fastest way to get a straight answer for your situation.