How to Spot Chain Link Fence Damage Before It Needs Full Replacement
Most chain link fence repair starts the same way: someone notices a problem, usually long after it began. A tenant reports a sagging gate. A snowplow clips a corner post. Additionally, a section of fabric peels away from the rail after a windstorm. The good news is that chain link damage follows predictable patterns, and if you know what to look for, you can catch most problems while they are still a repair job instead of a fence replacement.
This guide walks through how to inspect a chain link fence step by step. It covers the four damage types that matter most in Anchorage: rust, torn fabric, sagging, and post movement from frost heave. Whether you manage fences across several rental properties or you inherited an aging perimeter fence with a new home, the inspection process is the same.
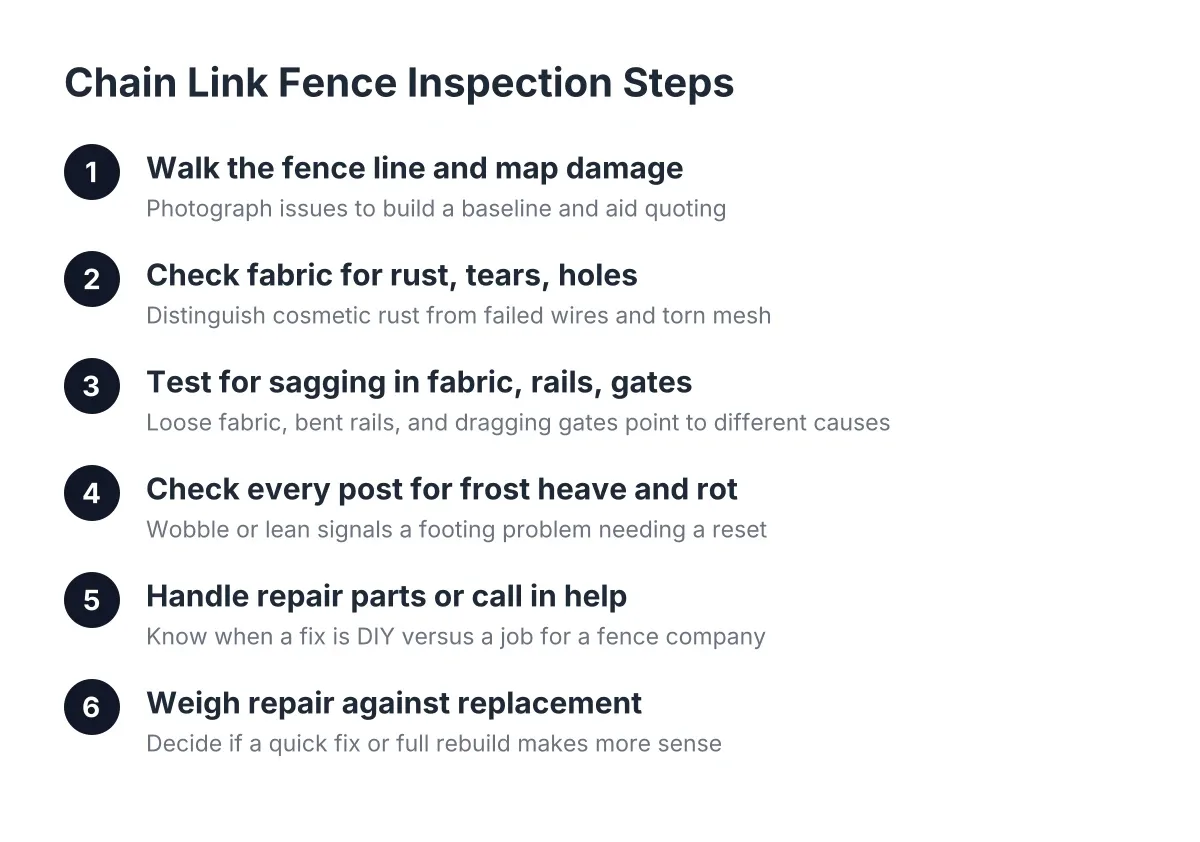
Step 1: Walk the Full Fence Line and Map What You Find
Start with a complete walk of the fence, not a glance at the section someone complained about. Damage rarely lives in one spot. Wind, snow load, and frost heave stress the whole run, so the section that failed is often a symptom of a weaker system.
Bring your phone and take photos of anything that looks off. For a property manager covering multiple sites, a simple photo log per property does two things. First, it gives you a baseline so you can tell new damage from old next season. Second, it gives any fence company a clear picture before they quote, which keeps estimates tight and avoids surprise scope changes.
Note the fence's age and height while you walk. In Anchorage, residential front-yard fences are capped at 4 feet in most zones under Anchorage Municipal Code, with taller limits in certain districts, according to the Municipality of Anchorage. That matters if a repair turns into a partial rebuild and you want to change the height.
Step 2: Check the Fabric for Rust, Tears, and Holes
Inspect the chain link fabric itself, which is the woven mesh between the posts. Run your eyes along the bottom edge first. The bottom of the fence takes the most abuse: snow sits against it for months, string trimmers nick the coating, and dogs and tenants push against it.
Here is what each finding means:
- Surface rust on galvanized fabric. Light orange discoloration on an older fence is cosmetic. It tells you the zinc coating is wearing thin, but the fence still has life. Note it and move on.
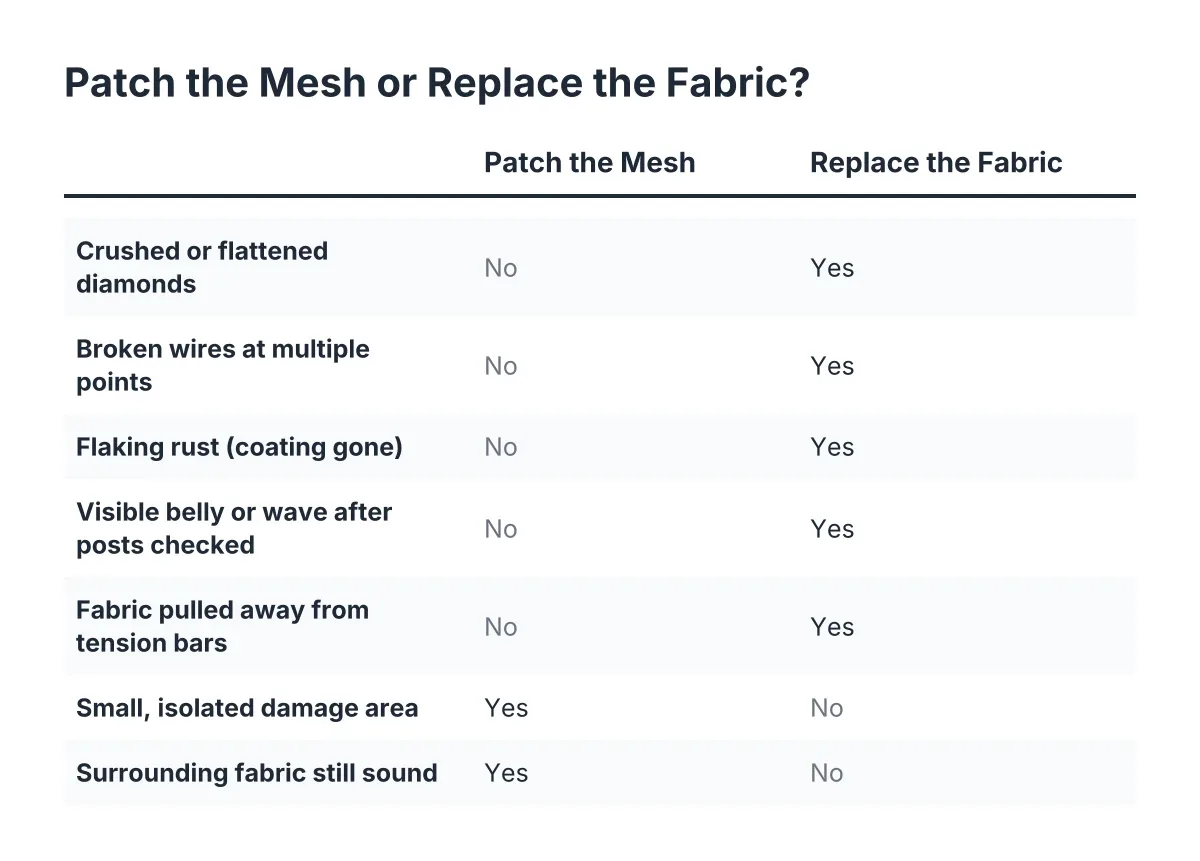
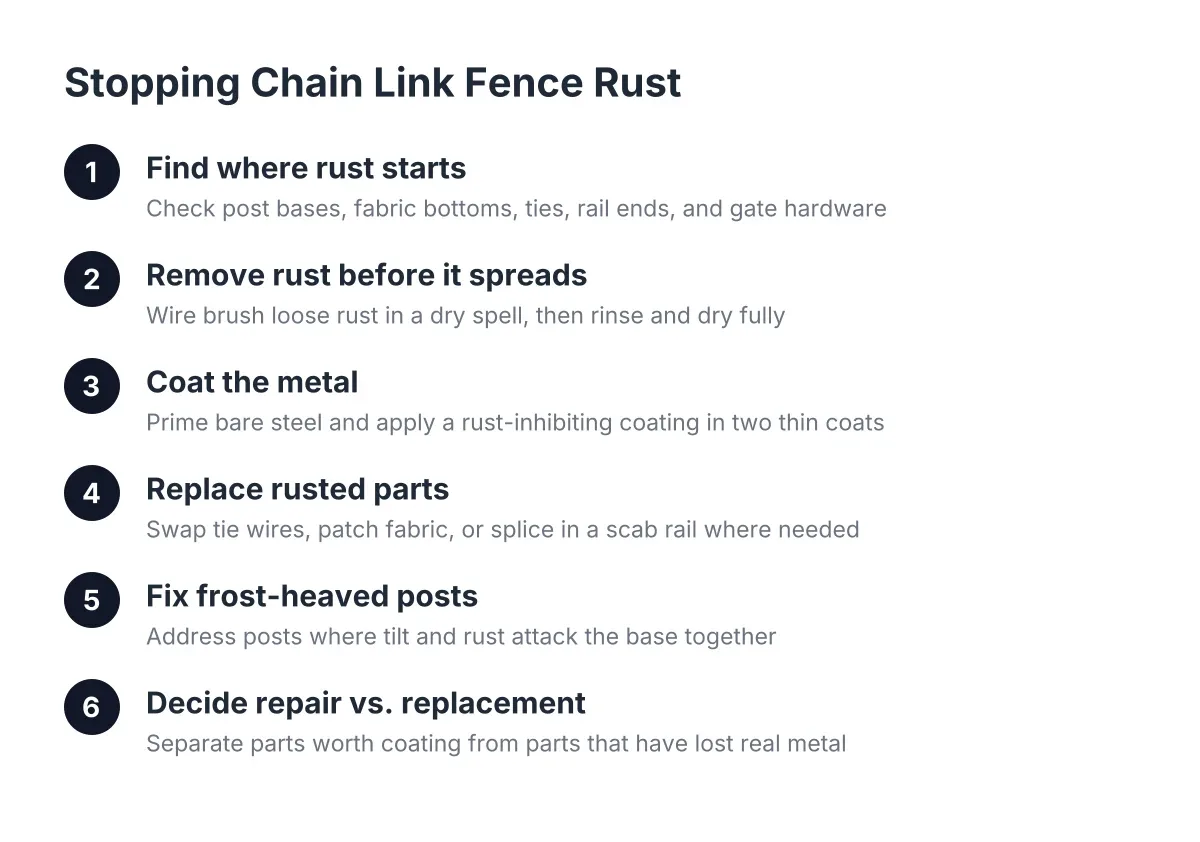
- Flaking, scaling rust. When rust eats through individual wires and they snap under thumb pressure, that fabric section is done. Patching a corroded section with new mesh works, but if the whole run crumbles, replacing the fabric while keeping the posts is often the smarter move.
- Tears and holes. A clean tear from impact, say a falling branch or a vehicle, can usually be mended. Small holes get woven closed with repair wire. Larger tears call for splicing in a patch section from a repair roll, weaving the new fabric into the old with a loose strand of wire.
- Fabric pulled off the rail or posts. If the mesh flaps free of the frame, the problem is usually failed fence ties, not the fabric. That is one of the cheapest fixes on this whole list.
A quick note on ties, since they fail more often than people expect. Fence ties come in different lengths matched to the pipe diameter, and they only hold if they are bent so the wrap traps the fabric link tight against the pipe. A tie bent the wrong way sits loose, and Anchorage wind will pop it open. If a fence keeps shedding its fabric every winter, poorly wrapped ties are a likely culprit.
Step 3: Test for Sagging in the Fabric, Rails, and Gates
Sight down the fence line from one end. The top of the fabric should run straight and tight between posts. Sag shows up three ways, and each points to a different cause.
First, loose fabric that bellies between posts means the tension has let go. Chain link is stretched tight during fence installation and held by tension bars and bands at the end posts. When a tension band breaks or a bar slips, the whole run slackens. Re-stretching fabric takes a fence puller and some experience; it is the one fabric repair most property owners should not attempt alone.
Second, a bent or bowed top rail means something pushed on the fence, usually heavy snow load shoved against it by a plow or sliding off a roof. A bent rail section can be cut out and replaced with a new rail and sleeve couplings without touching the fabric.
Third, a dragging or misaligned gate points to hinge wear or, more often in Anchorage, movement in the gate post itself. Gates get the most daily use and the most complaints. For example, suppose a property manager runs a 12-unit building where the trash enclosure gate drags every spring and swings free every fall. That seasonal pattern is not a hinge problem. It is the post moving with the freeze-thaw cycle, which brings us to the next step.
Step 4: Check Every Post for Frost Heave and Rot
Grab each post and push it firmly in both directions along the fence line and across it. A sound post set below frost depth does not move. Any wobble, lean, or lift means the footing has a problem, and in Anchorage the usual cause is frost heave.
Frost heave happens when water in the soil freezes, expands, and pushes the post and footing upward. A post set too shallow ratchets up a little more each winter. You can often spot it without touching the fence: look for posts that sit taller than their neighbors, concrete footings poking above grade, or a fence line that waves up and down like a roller coaster.
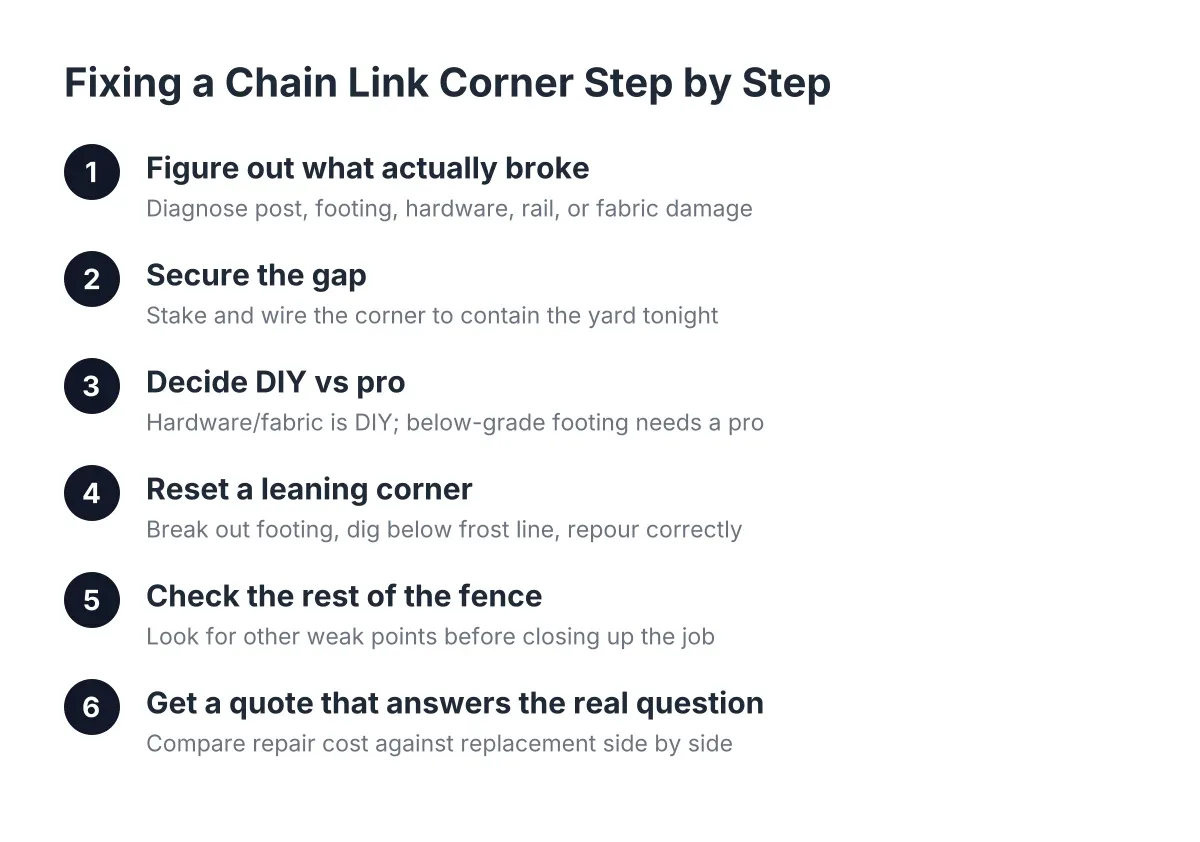
Heaved posts are the repair that separates a quick fix from a structural one. Resetting a post means digging out the old footing, deepening the hole below frost depth, and setting the post again. Doing it right once beats resetting the same post every other spring, which is the trap one-off handyman fixes tend to fall into.
While you are at the posts, check for rot if any part of the fence uses wood posts, which is common where chain link meets an older cedar fence on mixed in-town lots. A wood post that is soft at ground level is failing even if the rest of the fence looks fine. The first instinct is to rip out the post and its concrete footing, but that is not always the practical answer. Cutting the post above the rotted section and setting a steel post into the existing footing can hold the line at a lower cost, and that repair money is not wasted if a full replacement with steel posts comes later.
Step 5: Handling Chain Link Fence Repair Parts and When to Call In Help
Sort your findings into three buckets. This is where the inspection pays off, because it tells you whether you are shopping for parts or calling a fence contractor.
Owner-fixable with basic chain link fence repair parts:
- Replacing bent or missing fence ties
- Weaving small holes closed with repair wire
- Swapping worn gate hinges or a latch
- Replacing a missing tension band nut or carriage bolt
Worth a professional for tools and tensioning:
- Re-stretching slack fabric across a long run
- Splicing a patch section from a repair roll so it blends and holds tension
- Replacing a bent top rail on a stretched fence
Professional work, full stop:
- Resetting heaved or leaning posts below frost depth
- Replacing corroded fabric across a whole run
- Rebuilding gate posts that move seasonally
- Any repair where the fence borders a parking area, playground, or other liability exposure on a managed property
Hardware store repair kits cover the first bucket well. They do not cover tensioning or footings, which is where most failed do-it-yourself repairs end up.
Step 6: Weigh Repair Against Replacement Before You Spend
Run the math before committing to repairs on an old fence. Chain link is the budget-friendly option among fence types; a new chain link fence runs about $10 to $40 per linear foot installed, according to HomeGuide. If a fence needs new fabric, several reset posts, and a rebuilt gate, the repair total can crowd the replacement cost without delivering a new fence's lifespan.
As a rough decision rule for 2026 budgeting: repair when the damage is localized and the posts are sound, and lean toward fence replacement when more than a third of the posts move or the fabric rusts through along the full run. For a property manager, the portfolio view matters too. Getting one consistent assessment across all your properties, with each fence slotted into repair-now, monitor, or replace, keeps spending predictable instead of reactive.
One honest limitation: no visual inspection can confirm how deep a footing sits or what the soil is doing below grade. If posts keep moving despite resets, or if a fence failure created an insurance or liability question, bring in a fence company to assess the footings directly rather than guessing from the surface.
What a Damage Checklist Does for You Next Season
The inspection habit matters more than any single fix. A ten-minute walk each spring, after the ground thaws and before tenant season picks up, catches loose ties before they become torn fabric and heaved posts before they become leaning fence lines. Damage in chain link compounds; every loose connection transfers stress to the next one.
Keep the photo log, date it, and compare year over year. When you need to address chain link fence issues, you will hand over a documented scope instead of a vague complaint, and the estimate you get back will reflect the actual job.
If you need chain link fence repair, Anchorage Fence Co can help.
Prefer to talk it through? Call (907) 312-2862 — a quick call is usually the fastest way to get a straight answer for your situation.